How it works
Set up your source application in Zapier
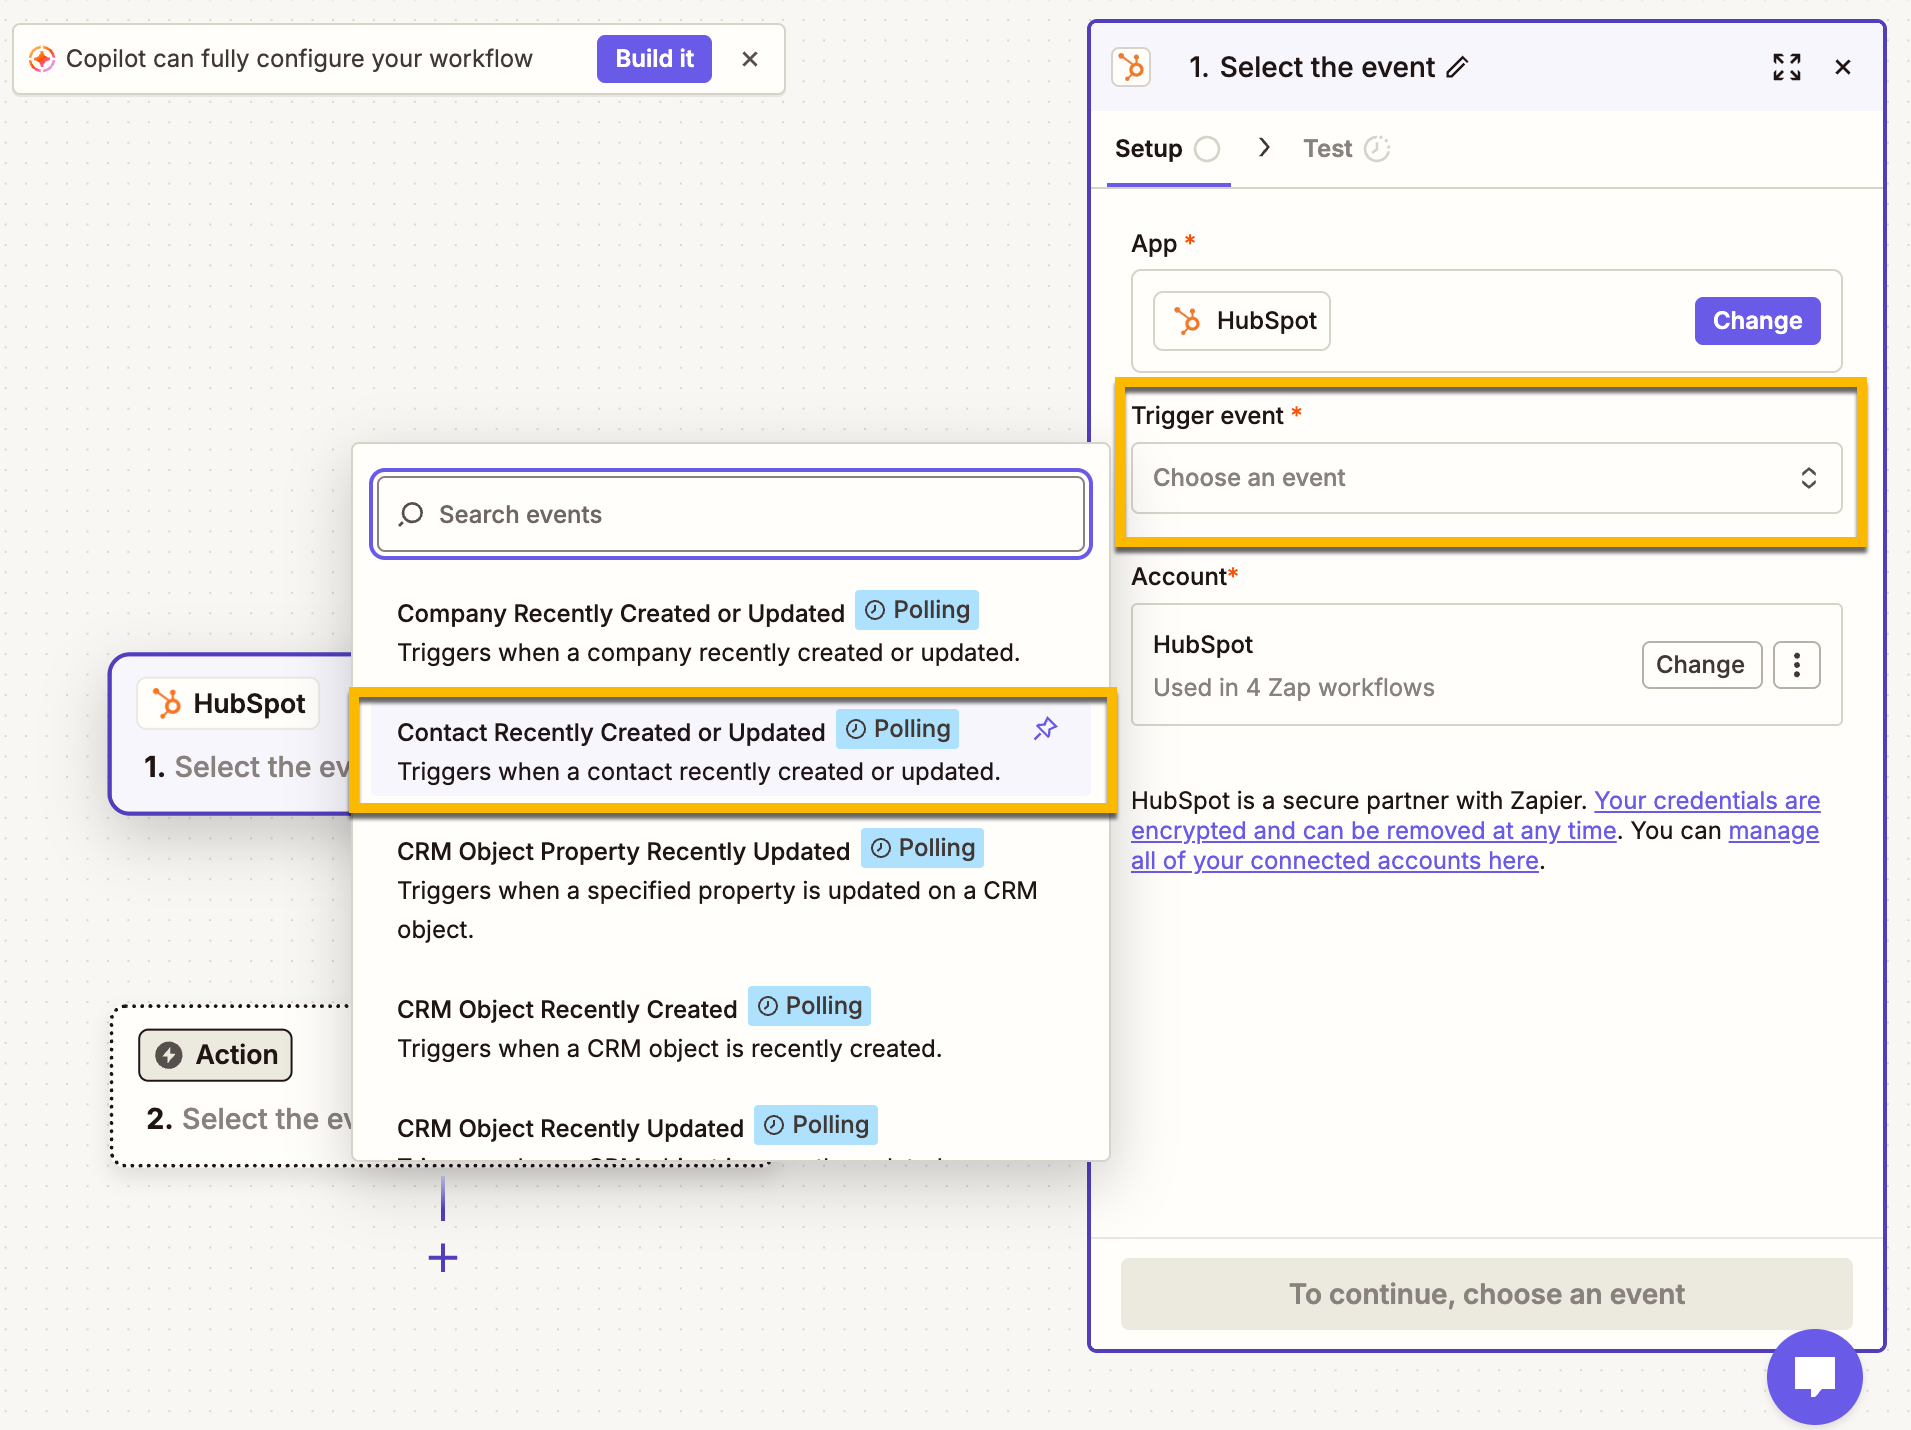
Identify your trigger event, such as a new contact created/updated in CRM, and authenticate your external source account.
Set up Squirrels.ai in Zapier
Choose the “Add Contact to Mission” action and map incoming data fields directly to your target Squirrels.ai mission.
Start the Zap
Run a quick integration test to verify the connection, publish your workflow, and let Zapier automatically sync new contacts.
Before you start
Link Zapier as an external system in Squirrels.ai
Before setting up your workflow in Zapier, authorize your target mission to accept contacts via Zapier.
- Log in to your Squirrels.ai dashboard.
- Open your target mission (e.g., your AI SDR mission).
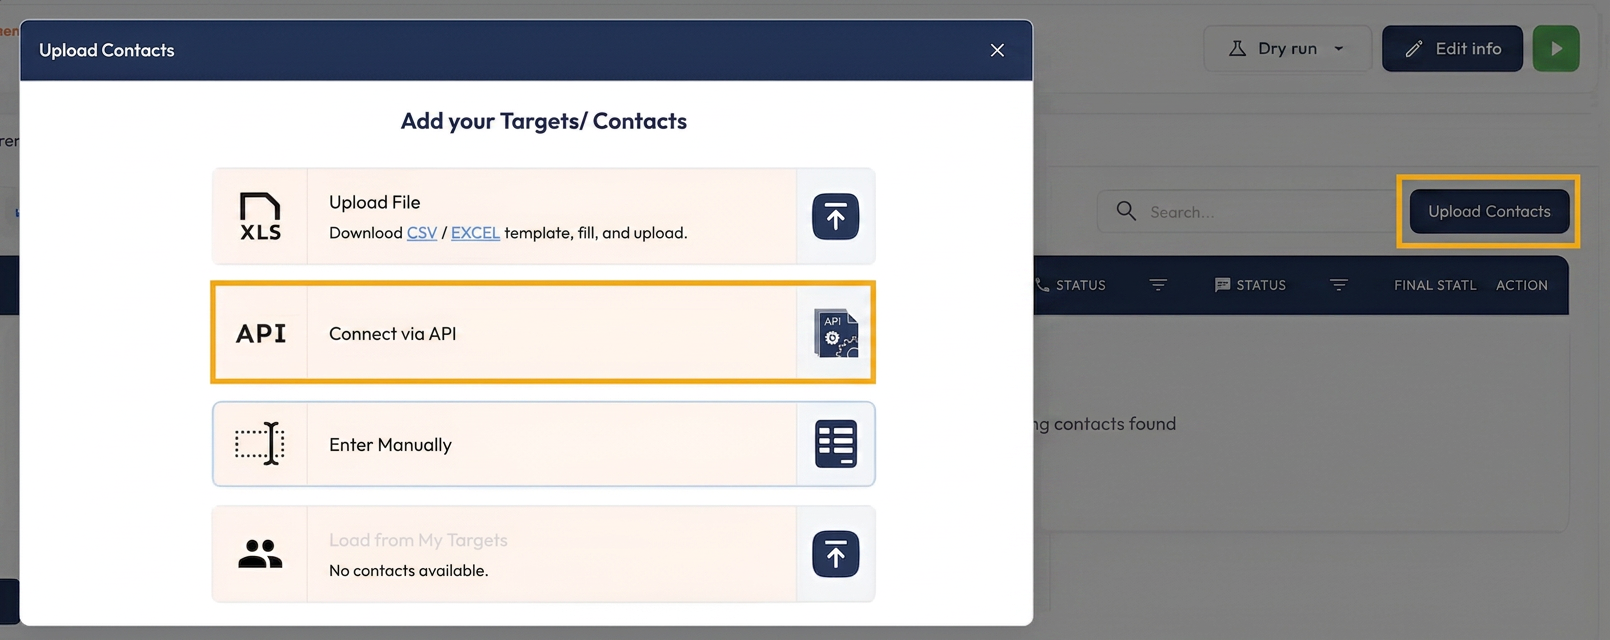
- Go to Upload Contacts – select Connect via API.
- Choose Zapier from the integration dropdown menu and click Connect.
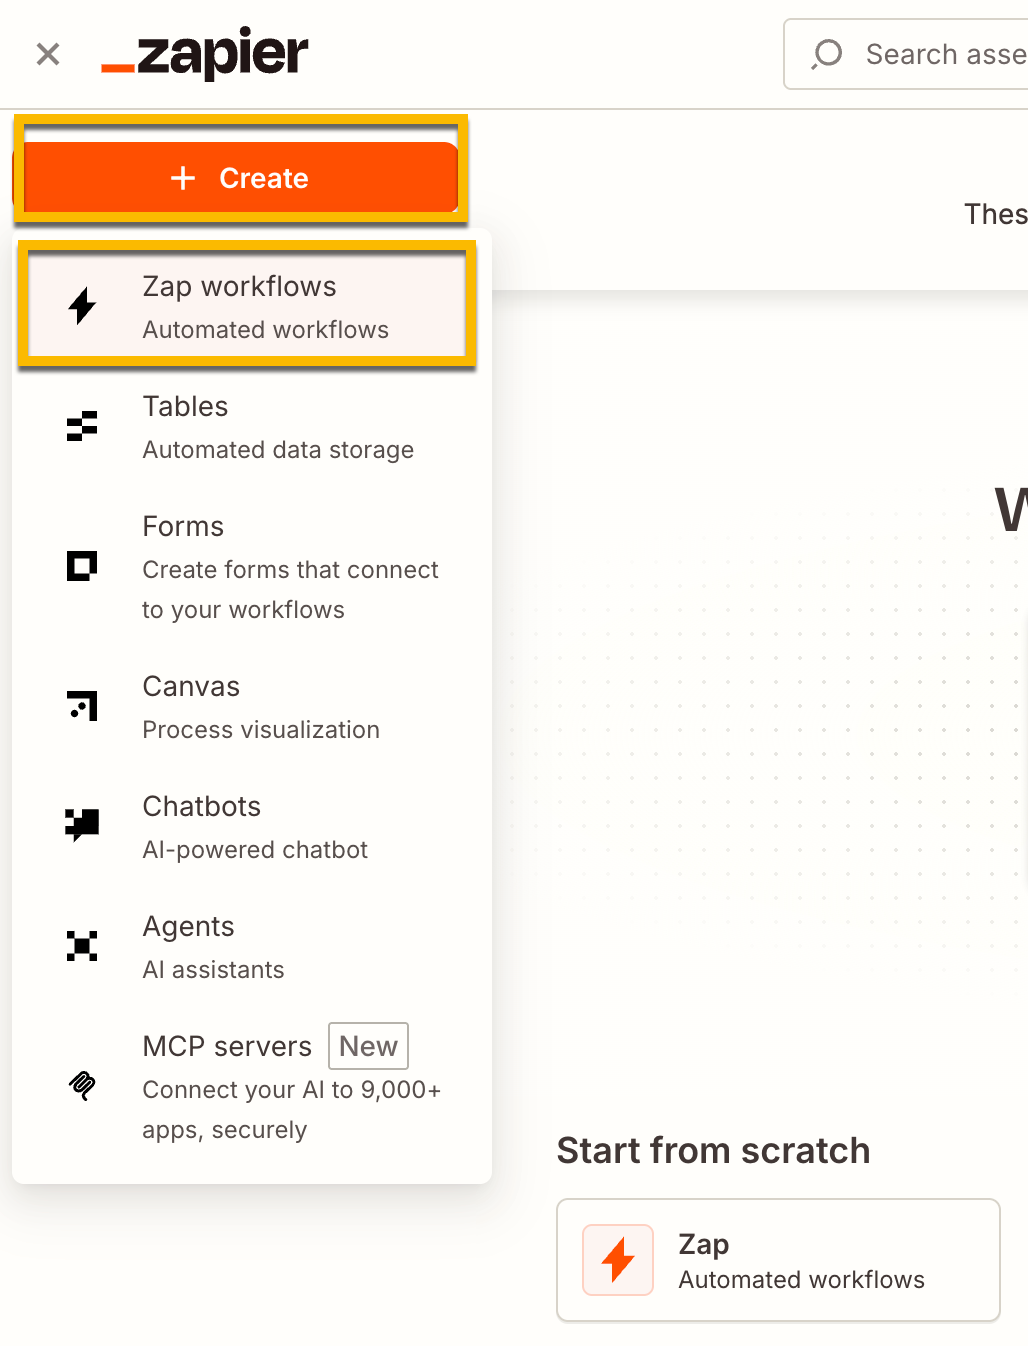
- Log in to your Zapier account and click Create Zap.
A. Configure the Trigger (Source System)
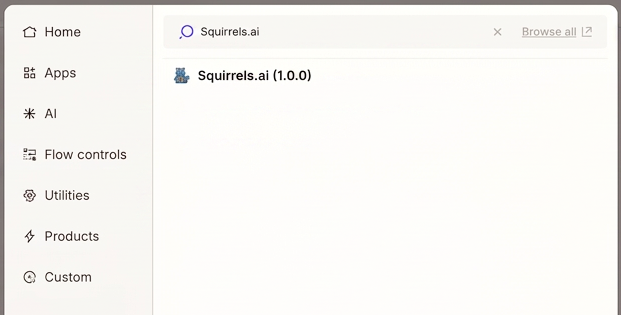
- Search for and select your source app (If you cannot find it in the search, use this to connect/add the Squirrels.ai app on Zapier).
- Choose your Trigger Event (e.g., a new or updated spreadsheet row or a recently created/updated contact).
- Connect your source app account and configure the setup, if required.
B. Configure the Action (Squirrels.ai)
In the Action step, search for and select Squirrels.ai (If you cannot find it in the search, use this to connect/add the Squirrels.ai app on Zapier).
- Select the Action Event: Add Contact to Mission.
- Connect your Squirrels.ai account when prompted and authorize the connection.
- Select the target Squirrels.ai Mission you connected in Step 1.
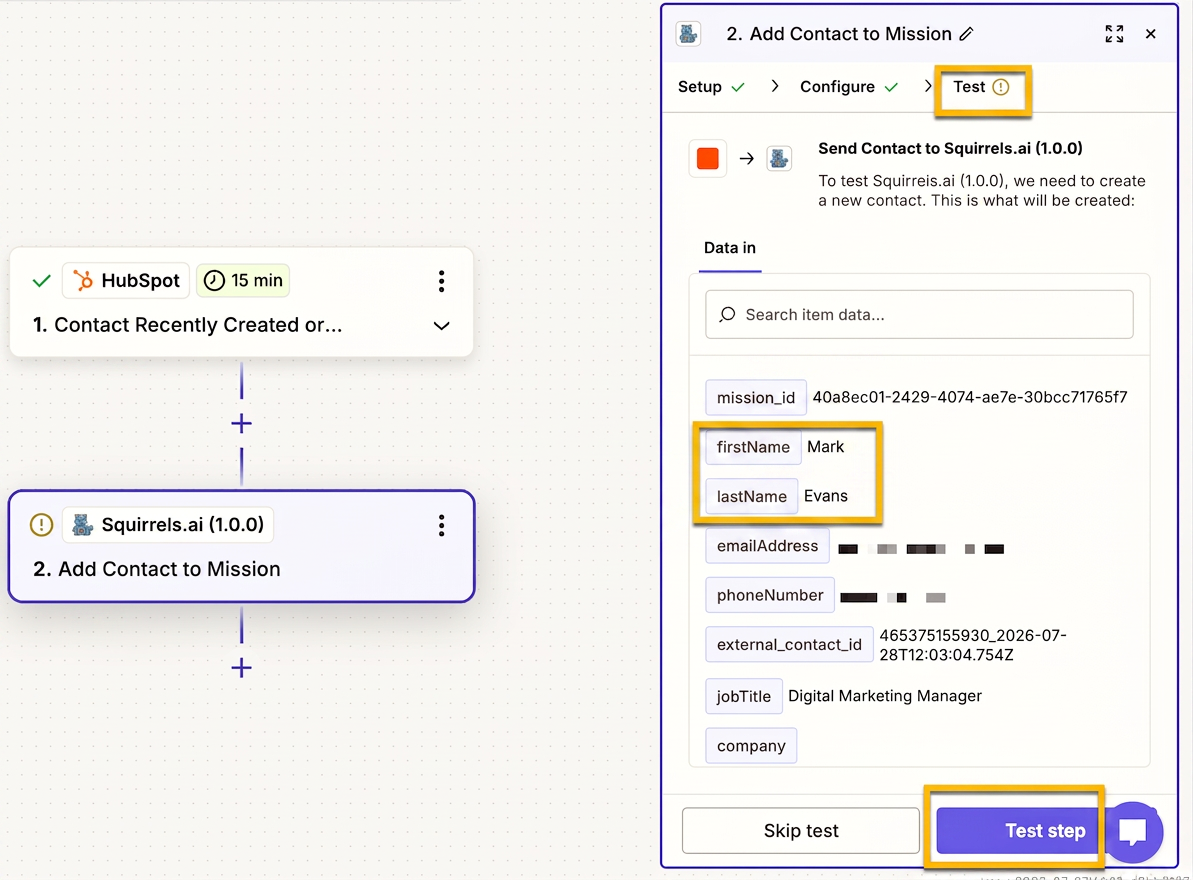
- Map contact fields and verify mandatory data. Map the incoming data fields from your source system to the corresponding fields in Squirrels.ai.
Test and publish your Zap
- Click Test Step in Zapier to send the test contact into your Squirrels.ai mission.
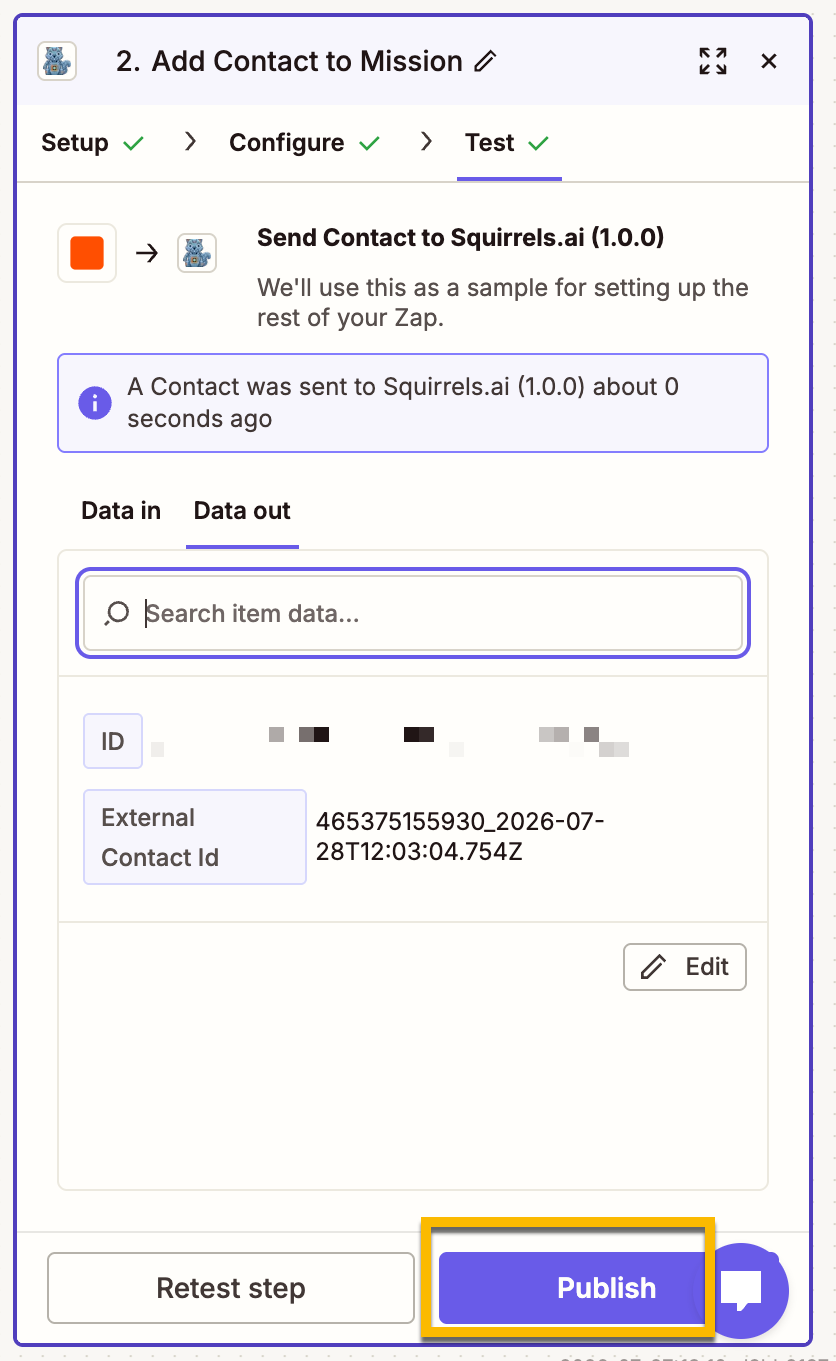
- Switch to your Squirrels.ai mission dashboard and verify that the test contact appears in the contact list.
- Click Publish Zap. Once active, Zapier will check for new data every 15 minutes and push new contacts straight into your mission.
Troubleshooting checklist
Contacts failing to sync? Work through the three checks below in order.
Connect your everyday tools via Zapier and let AI agents seamlessly sync, process, and act on incoming data across your entire mission.